
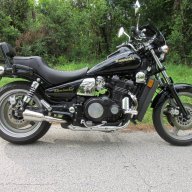
Zl900 no spark I think

:hello: Yes the 5 Kohm resistors are removed by removing the brass retainer that is up inside the spark plug cap using a screwdriver. The other end that the spark plug wire goes into has a threaded stem. You screw the plug cap onto the plug wire. Go about 6 or so full turns. After screwing in the plug wire pull on it just a little bit to make sure it is secure. Before you do anything put a dab of dielectric grease inside both ends. Also check for 5 Kohms after you screw the wires into the caps by placing one of the meter leads into the end of the wire that screws into the coil and put the other meter lead up inside the spark pug cap that snaps onto the spark plug.
 
Last edited:
:hello: Yes the 5 Kohm resistors are removed by removing the brass retainer that is up inside the spark plug cap using a screwdriver. The other end that the spark plug wire goes into has a threaded stem. You screw the plug cap onto the plug wire. Go about 6 or so full turns. After screwing in the plug wire pull on it just a little bit to make sure it is secure. Before you do anything put a dab of dielectric grease inside both ends. Also check for 5 Kohms after you screw the wires into the caps by placing one of the meter leads into the end of the wire that screws into the coil and put the other meter lead up inside the spark pug cap that snaps onto the spark plug.
Okay I took out all the brass retainer screws and all the resistors are good but when it’s all connected only one shows resistance. I just tried to screw the wire tight on them and only one was loose but still shows no resistance when put together. I put die electric grease on the ends of the resistors and the wires. After unscreweing the wires completely to check the ceramic sleeves they are in tact. So as soon as I get the new wire in I’ll replace all four and try to fire it up again. Once i get it started I’m going to do a full clean up and get this bike running good but I don’t want to throw money at it until I know how it sounds running.

edit: if I make the new wires a touch longer is it gonna hurt anything? Some of them especially the wire for cylinder 4 and 2 are barely long enough to reach. And would it be a good ideas to pull the 2 coils out when installing the new wires for the first time?to screw them in first? I have everything marked so pulling them wouldn’t be a risk of loosing which was which.
Here’s hoping is as easy as a few bad wires and not something more serious
 
Last edited:
I can't think of any reason a little longer wire would hurt anything.

And I guess just to be sure, you have the left coil connected to cylinders 1&4, and the right coil to cylinders 2&3?
Red and black wires to the left coil, green and red to the right coil.
 
Last edited:
I can't think of any reason a little longer wire would hurt anything.

And I guess just to be sure, you have the left coil connected to cylinders 1&4, and the right coil to cylinders 2&3?
Red and black wires to the left coil, green and red to the right coil.
Yes the coils are labels 1&4 on the left side if your sitting on it and 2&3 on the right. Red and black left green and red right.
 
I’m not getting spark on 2 cylinders the 2 middle ones.

Coil fires 1&3 or 2&4, go to the manual and check out your wiring. It sounds like you're wired wrong. A dead coil will not fire one of the two cylinders it is timed for.
 
They are 1&4 and 2&3. You may be thinking of the firing order which is 1-2-4-3 but the coils themselves are wired as stated above. Each coil fires 2 cylinders every time, one for the cylinder that is on its compression stroke and the other that is on its exhaust stroke. Known as waste spark.
 
Last edited:
Exactly, I didn't put the quotes on his statement made in post #11. It's not a coil malfunction if it's hitting on the outside cylinders.

Unless he has it wired improperly and one coil has its leads feeding 1&4.
 
I'm not following. The outside cylinders, 1&4, are fired by 1 coil which, at least from the factory, was mounted on the left side of the frame. The coil mounted on the right side fires 2&3. If that coil(or one of the items needed to make it fire) is defective, then 1&4 can fire while 2&3 will not.
 
:hello: PHIP: You need to take the small springs out of the caps and clean off all the corrosion. Then spary contact cleaner up inside the ceramic housing and clean inside them with Q-tips. Then blow them out with air. When putting the caps back together put a dab of dielectric grease on all the parts as you put them back in the caps. When I did mine I did take the coils off in order to screw the plug wires into them. I did make my new wires one inch longer than the longest stock wire. I made them all the same length. I do this in case they need shorted a 1/4 during future repairs.
 
The outside cylinders, 1&4, are fired by 1 coil which, at least from the factory, was mounted on the left side of the frame. The coil mounted on the right side fires 2&3. If that coil(or one of the items needed to make it fire) is defective, then 1&4 can fire while 2&3 will not.

:hello: PHIP: You need to take the small springs out of the caps and clean off all the corrosion. Then spary contact cleaner up inside the ceramic housing and clean inside them with Q-tips. Then blow them out with air. When putting the caps back together put a dab of dielectric grease on all the parts as you put them back in the caps. When I did mine I did take the coils off in order to screw the plug wires into them. I did make my new wires one inch longer than the longest stock wire. I made them all the same length. I do this in case they need shorted a 1/4 during future repairs.

The coils are set up as you stated above I just wrote it wrong before.
I have all the springs and parts pieces in the vinegar and baking soda bath right now for another round of cleaning.

In order to get my spark plugs out I needed to grind down an 18mm socket to fit in the cylinder. I bought 3 different 18mm sockets and none fit. Also bought a set of metric plug sockets also didn’t fit in the cylinder. But grinding the outside of the socket a little bit allowed it to set down onto the spark plug
 
"Philip brown, post: 253105, member: 7579"]The coils are set up as you stated above I just wrote it wrong before.

I guess I need to insert quotes occasionally also as I was referring to the post immediately preceding mine.

I just kind of remember once upon a time the moderators saying quoting all the time burned up all their storage space or something like that.

There are special sockets that you can buy that will fit in the head to get the spark plugs out but it sounds like you've engineered a suitable workaround.
 
5 hours total in the baking soda/ white vinegar bath and then the springs and screws were scuffed with a Brillo pad lightly. Then sprayed with brake parts cleaner then compressed air and now they are drying. Tomorrow I’ll do a ohm check of the cap all put together
 

Attachments

  • 95EE3554-B87A-4A9B-AE5E-F06307C99284.jpeg
    95EE3554-B87A-4A9B-AE5E-F06307C99284.jpeg
    114.8 KB · Views: 14
:hello: I have craftsman metric spark plug sockets which have a rubber insert. I even have to that lights up so you can see down into the spark plug well.
 
I just have that kind of luck LOL probably 2 rows over there was a socket that fit in perfect and get the 3 in the whole store that won’t work lol.
Got ancy and put the caps together to check the ohms and all 4 read end to end now!! So soon as the wires get here I can start diagnosing the next issue lol
 
Salt and vinegar bath then neutralize with baking soda and water is the way to clean them up.
 
The picture of the boots torn apart on the plate brings back memories! LOL
 
Back
Top